Telemetry Insights
DocumentationGetting Started

Creating Your Account

Creating Your Account

beginner10 minutes

There are two ways to create a Telemetry Insights account depending on how you came to the platform:

PathWhen to use
Web CheckoutYou are purchasing a device or subscription at telemetryinsights.com
In-App WizardYou received a device through a reseller, as a gift, or through a commercial or business purchase and are setting up directly from the app

Account creation is tied to either a purchase or a physical device, standalone open registration is intentionally not available. This ensures every account is matched with a device and subscription from the start.
Web Checkout Path

When you purchase a device or subscription at telemetryinsights.com, your account is created as part of the checkout process. There is no separate sign-up step.

Step 1 - Add to Cart & Proceed to Checkout

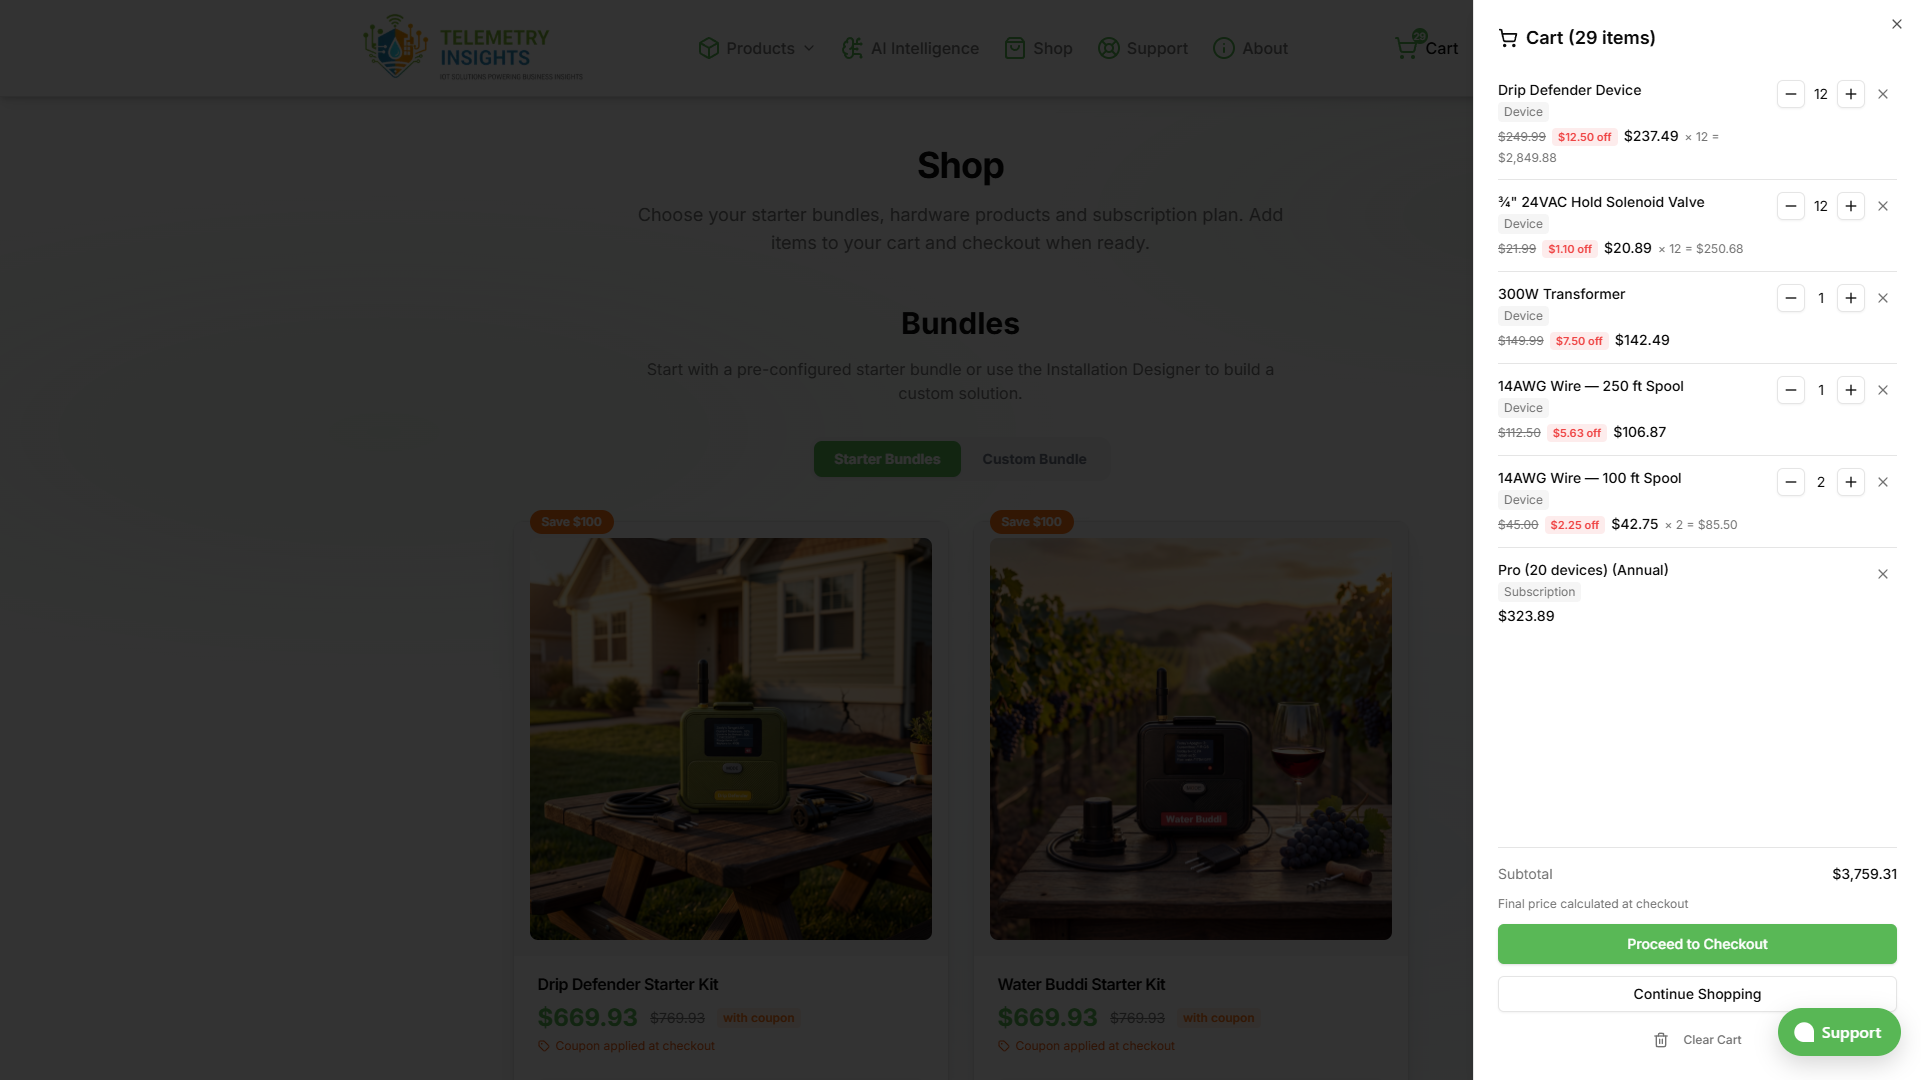
Browse the shop, add your device or subscription to your cart, and tap Checkout.

Shopping cart
View full size
Shopping cart

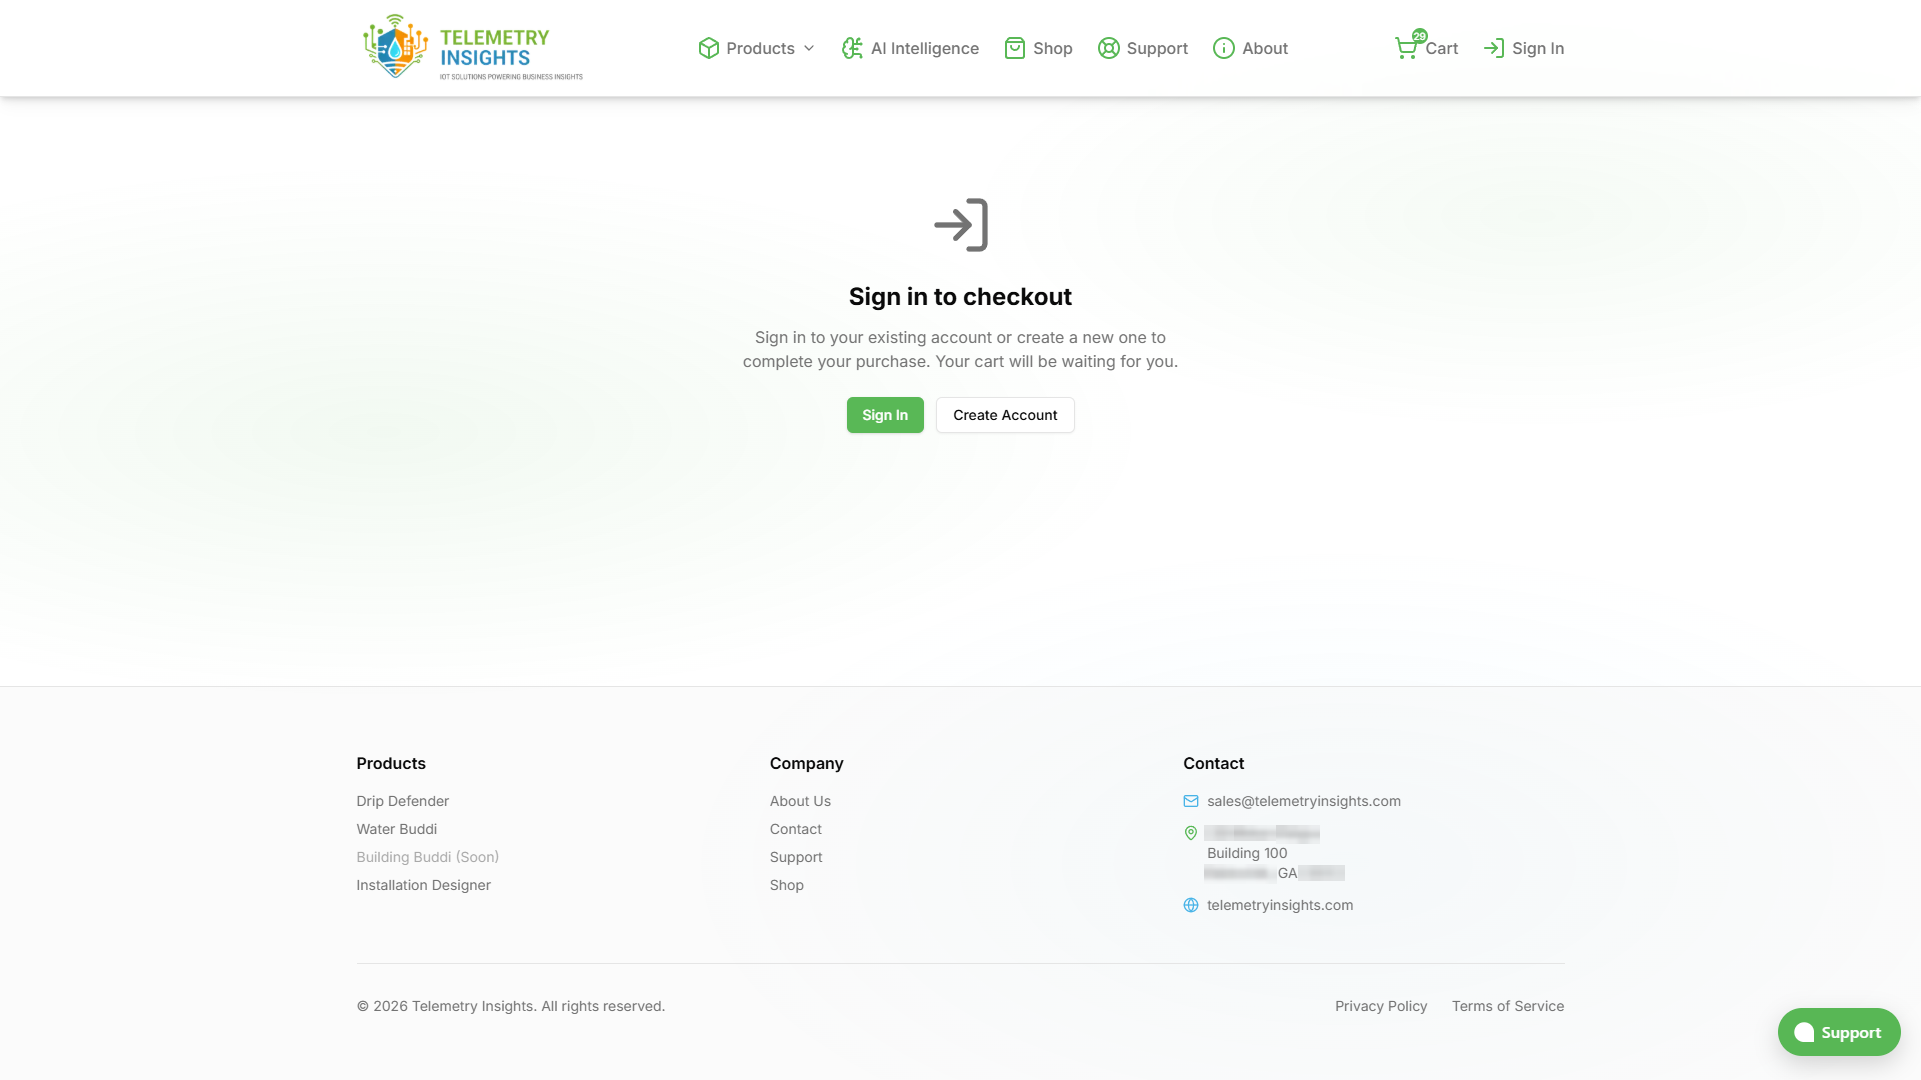
You will be prompted to sign in or create your account before completing the purchase.

Cart sign-in prompt
View full size
Cart sign-in prompt

Step 2 - Create Your Account (2 steps)

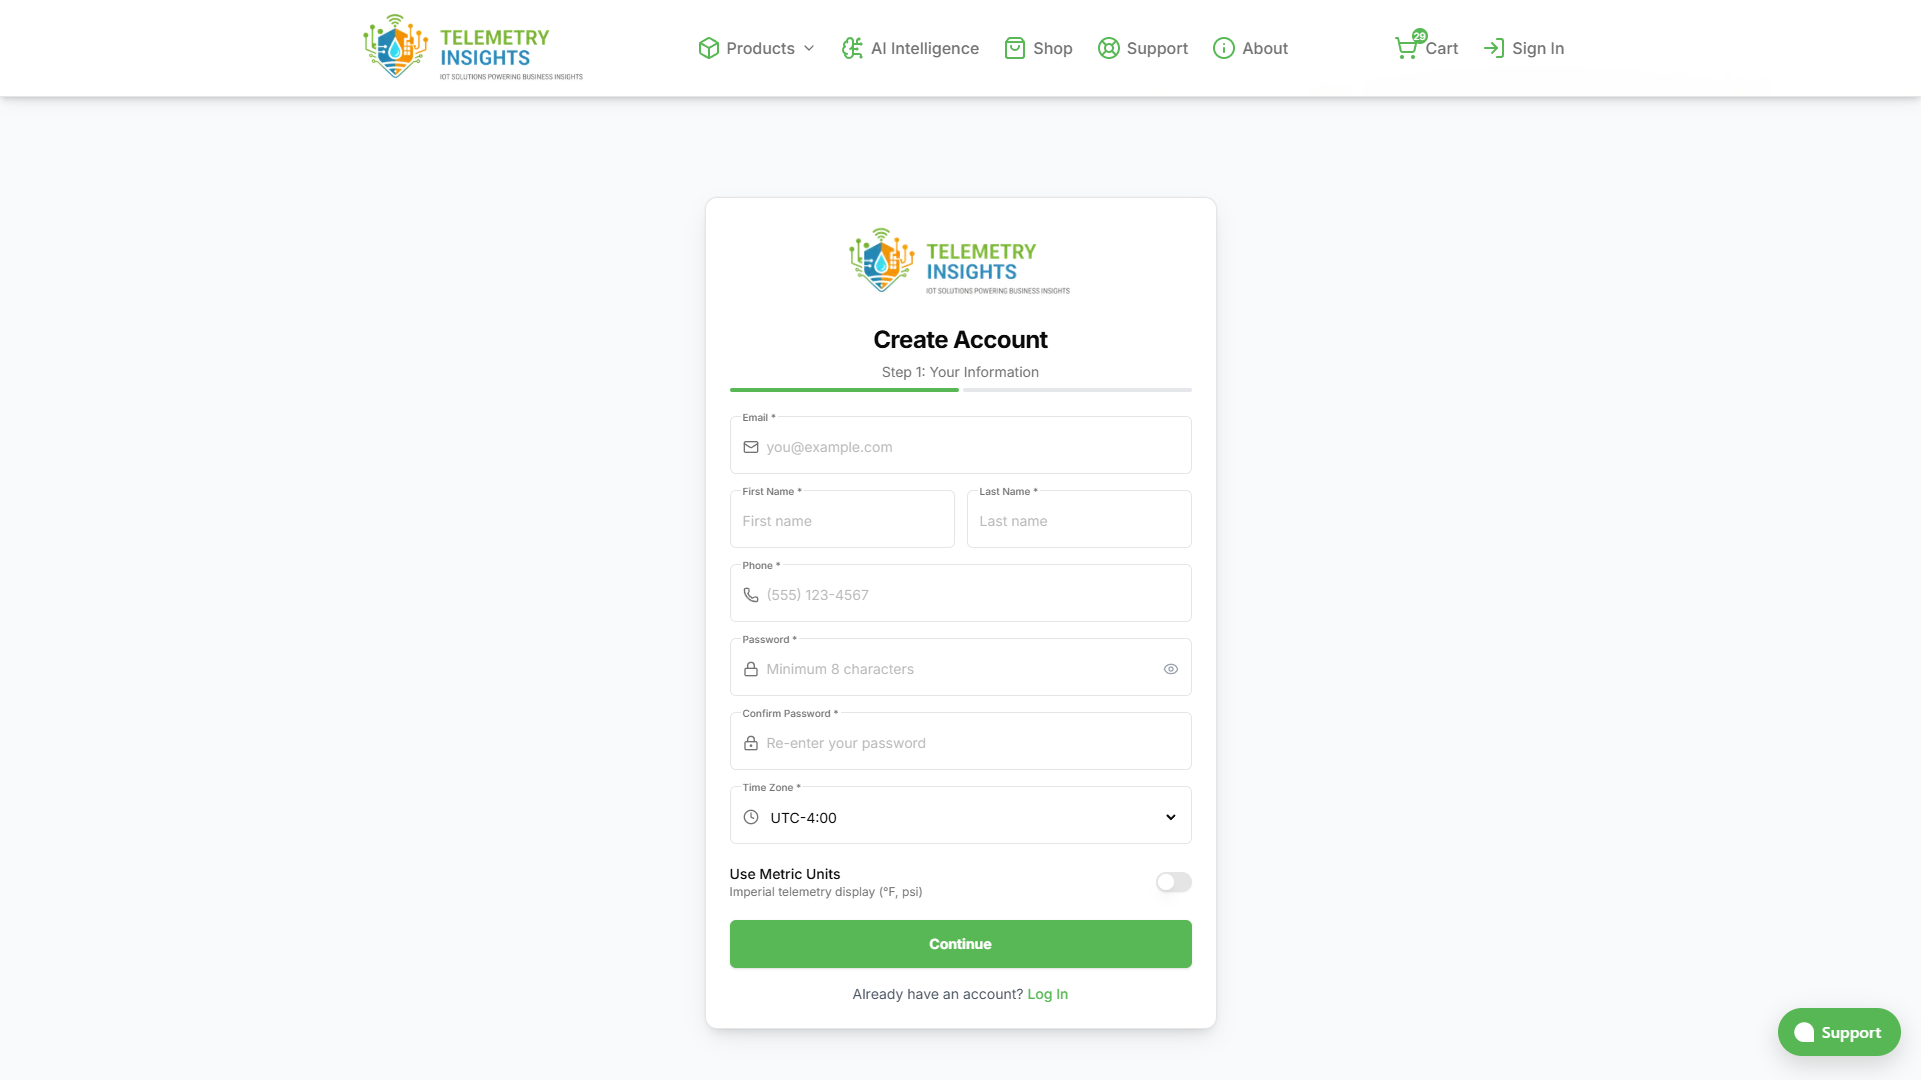
Your Info:

Checkout create account step 1, Your Info
View full size
Checkout create account step 1, Your Info
FieldRequiredNotes
EmailYesUsed to sign in, pre-filled if signing in with Google, Amazon, or Microsoft
First NameYes
Last NameYes
PhoneYes
PasswordYesMinimum 8 characters, not required if signing in with Google, Amazon, or Microsoft
Time ZoneYesAuto-detected
Metric UnitsNoDefaults to imperial (°F / psi). Toggle on for metric (°C / kPa).

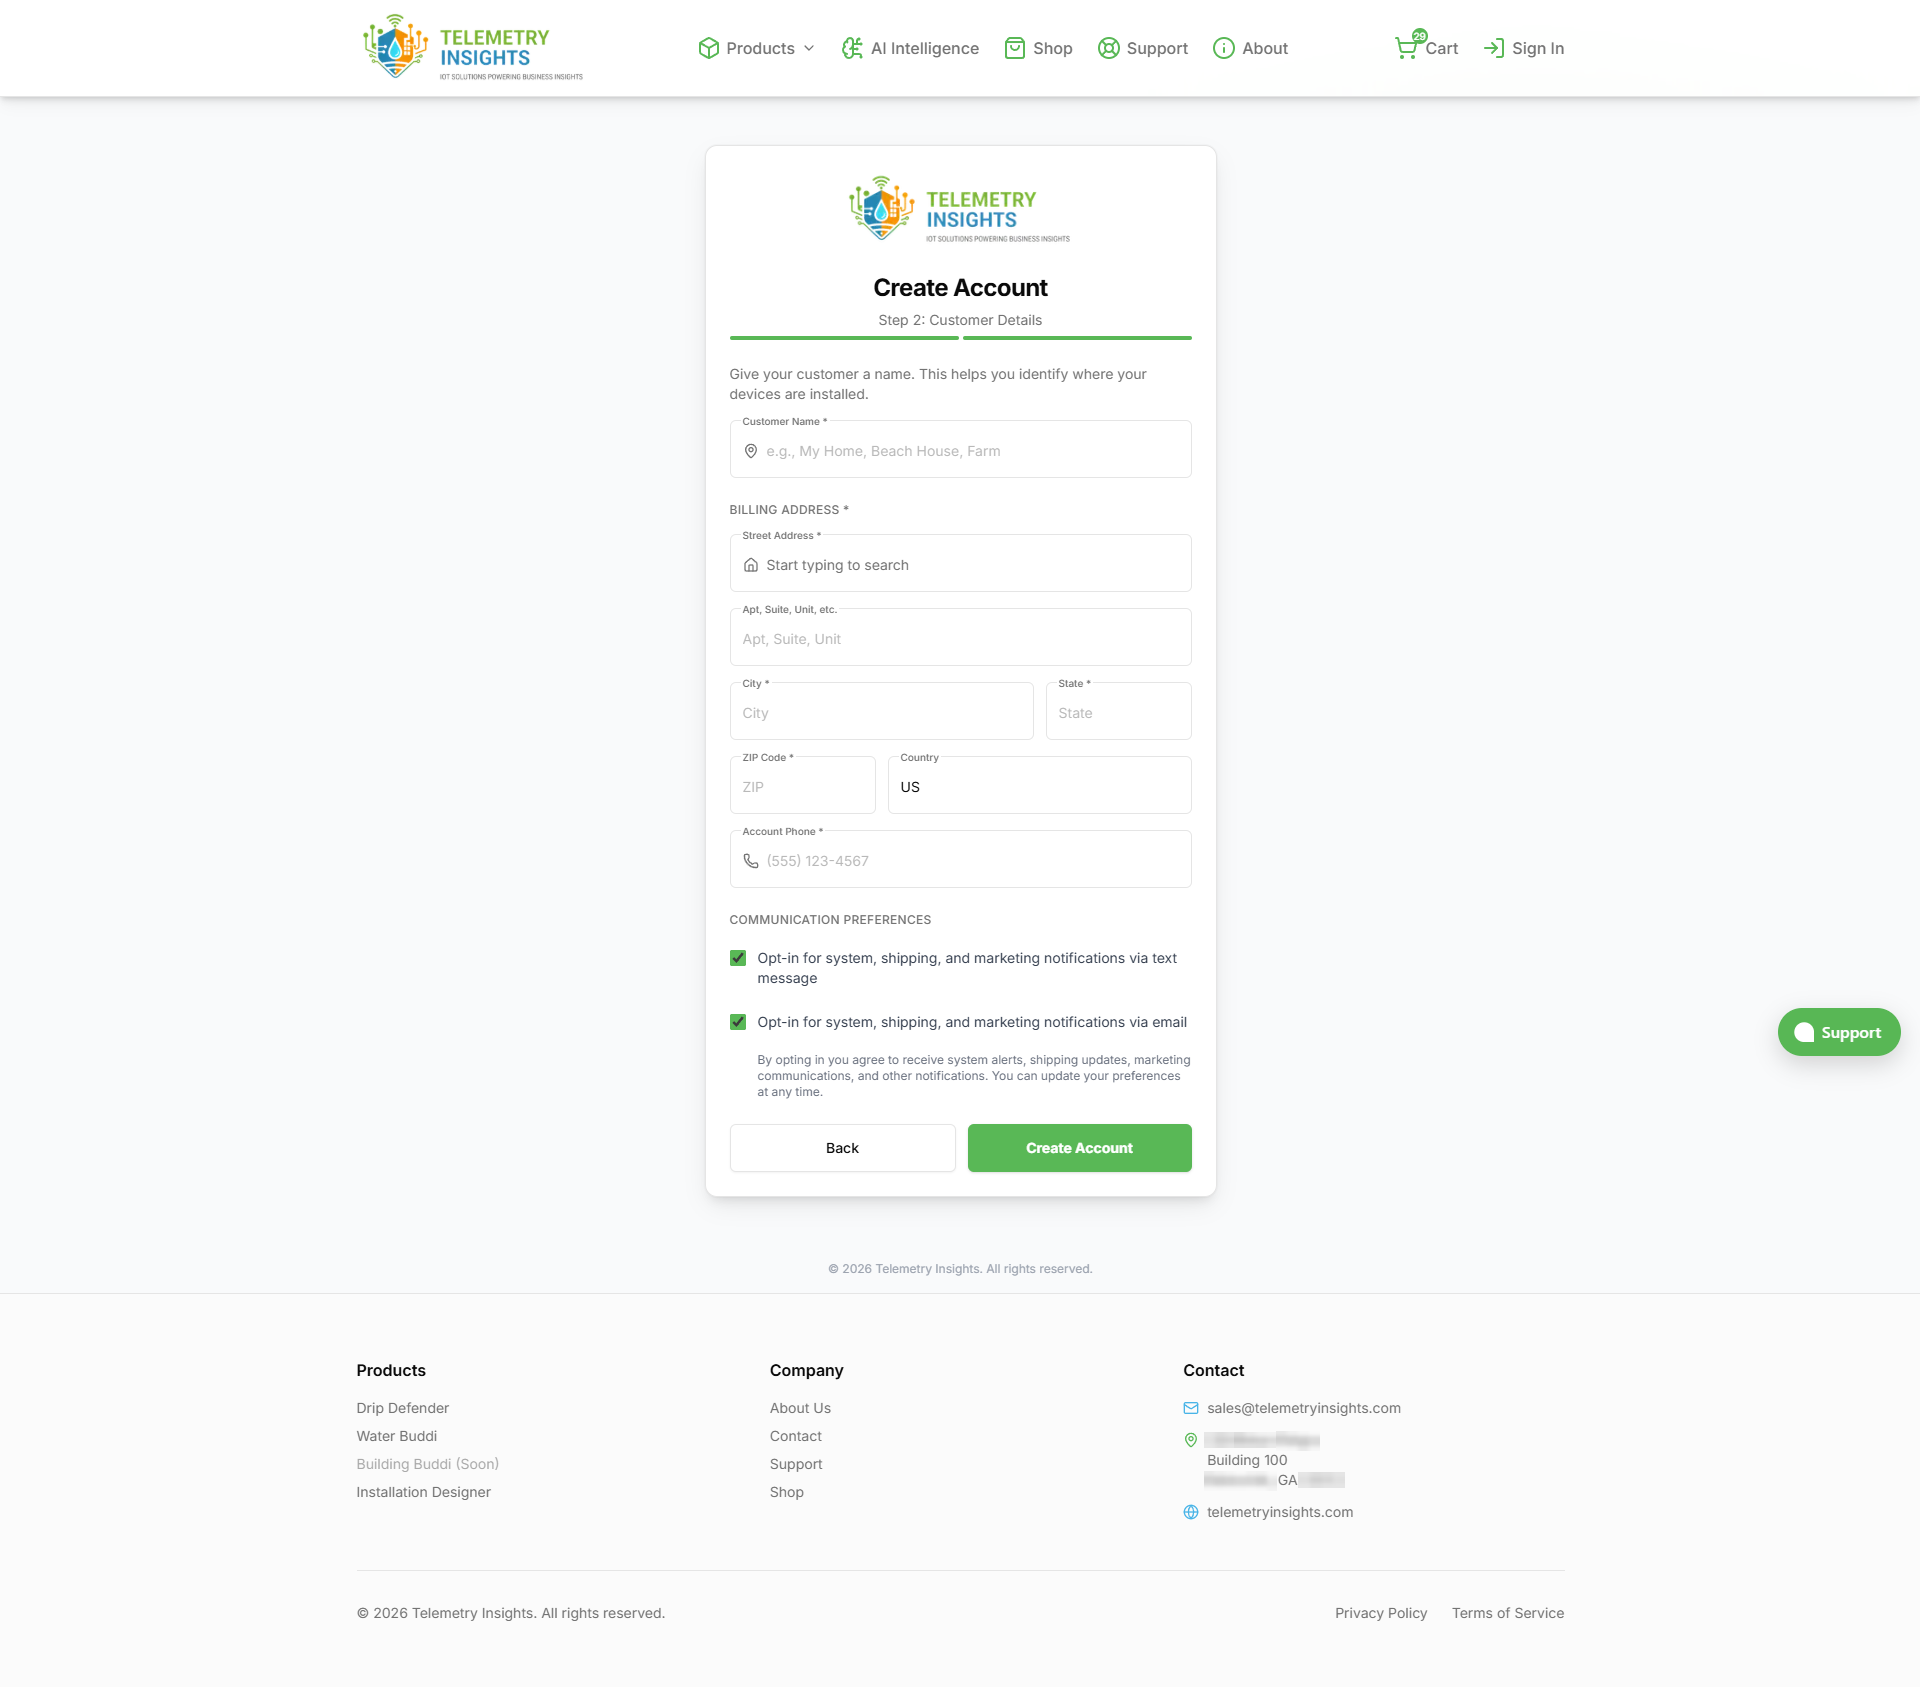
Your Account Info:

Checkout create account step 2, Your Account Info
View full size
Checkout create account step 2, Your Account Info
FieldRequiredNotes
Customer NameYesYour account or business name, e.g. "Smith Residence", "Acme Farms"
AddressYesBilling address, supports autocomplete
PhoneYes
Text notificationsNoOn by default
Email notificationsNoOn by default

Step 3 - Complete Your Purchase

Continue through payment. Once your order is confirmed your account is active. You will receive a confirmation email with your order details and your TI Manager credentials (email and password).

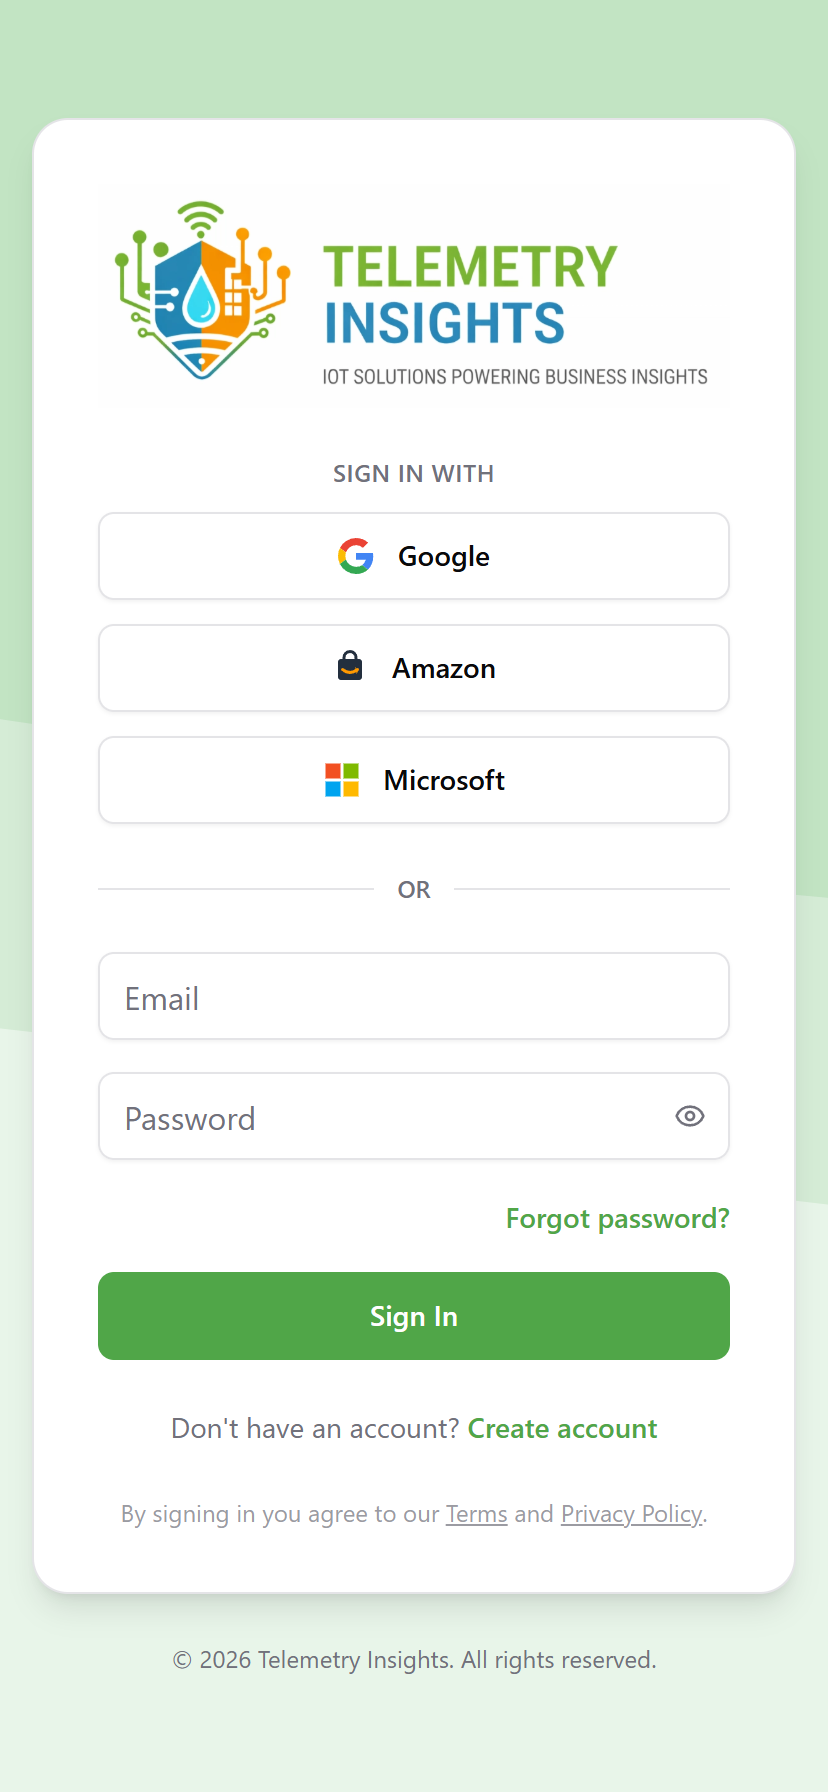
When you open the app you will see the sign-in screen with two options. You can enter your email and password directly, or if the email address you registered with belongs to a Google, Microsoft, or Amazon account, you can tap that provider's button instead, no separate password needed. The app will redirect you to that provider's familiar sign-in page and bring you straight back in once confirmed.

Step 4 - Sign In & Install the App

Install the Telemetry Insights app on your iOS (16.4 or later), Android (8.0 or later), or desktop device (PC or Mac), then sign in with your email and password, or tap the Google, Amazon, or Microsoft button if your email is with one of those providers.

App sign-in screen
View full size
App sign-in screen

Your account is ready. Continue to Adding Your Device →


In-App Wizard Path

If you received a device outside of a direct web purchase, through a reseller, a commercial installer, or as a gift, use the in-app account creation wizard. The wizard creates your account and links your first device in a single guided flow.

Before you begin, make sure your device is provisioned and you have these three items written down:

  • 🏷️ Device name, format Buddi-XXXXXX, shown on the LCD after connecting
  • 📶 WiFi network name (SSID), the network your device connected to
  • 🔐 6-digit PIN, entered during provisioning

Not provisioned yet? Start with Setting Up Your Device →

Before You Start - Install the App

Install the Telemetry Insights app on your iOS (16.4 or later), Android (8.0 or later), or desktop device (PC or Mac).

On the sign-in screen tap Create Account, or tap Sign in with Google / Amazon / Microsoft. New users are automatically taken into the account creation wizard.

App sign-in screen
View full size
App sign-in screen

The Wizard - 4 Steps

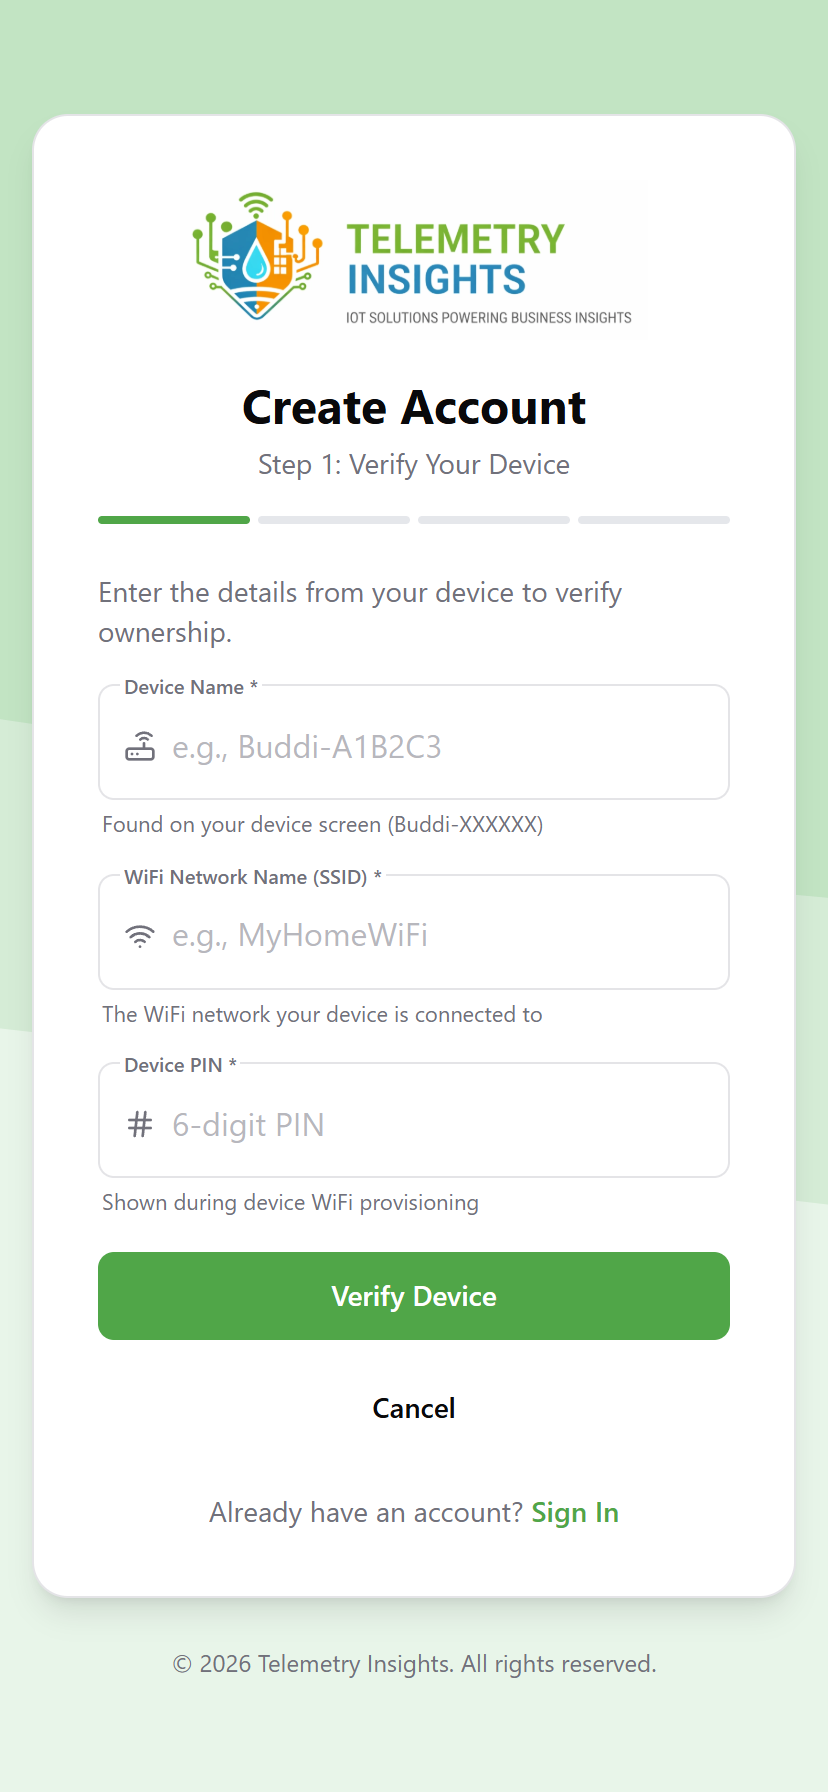
Wizard Step 1 - Verify Your Device

This step confirms you own the device you provisioned.

Wizard Step 1, Verify Your Device
View full size
Wizard Step 1, Verify Your Device
FieldRequiredNotes
Device NameYese.g. Buddi-A1B2C3, from your LCD screen
WiFi Network Name (SSID)YesThe network your device connected to
Device PINYesYour 6-digit PIN from provisioning

Tap Verify Device. The platform confirms the device is registered and ready to link.

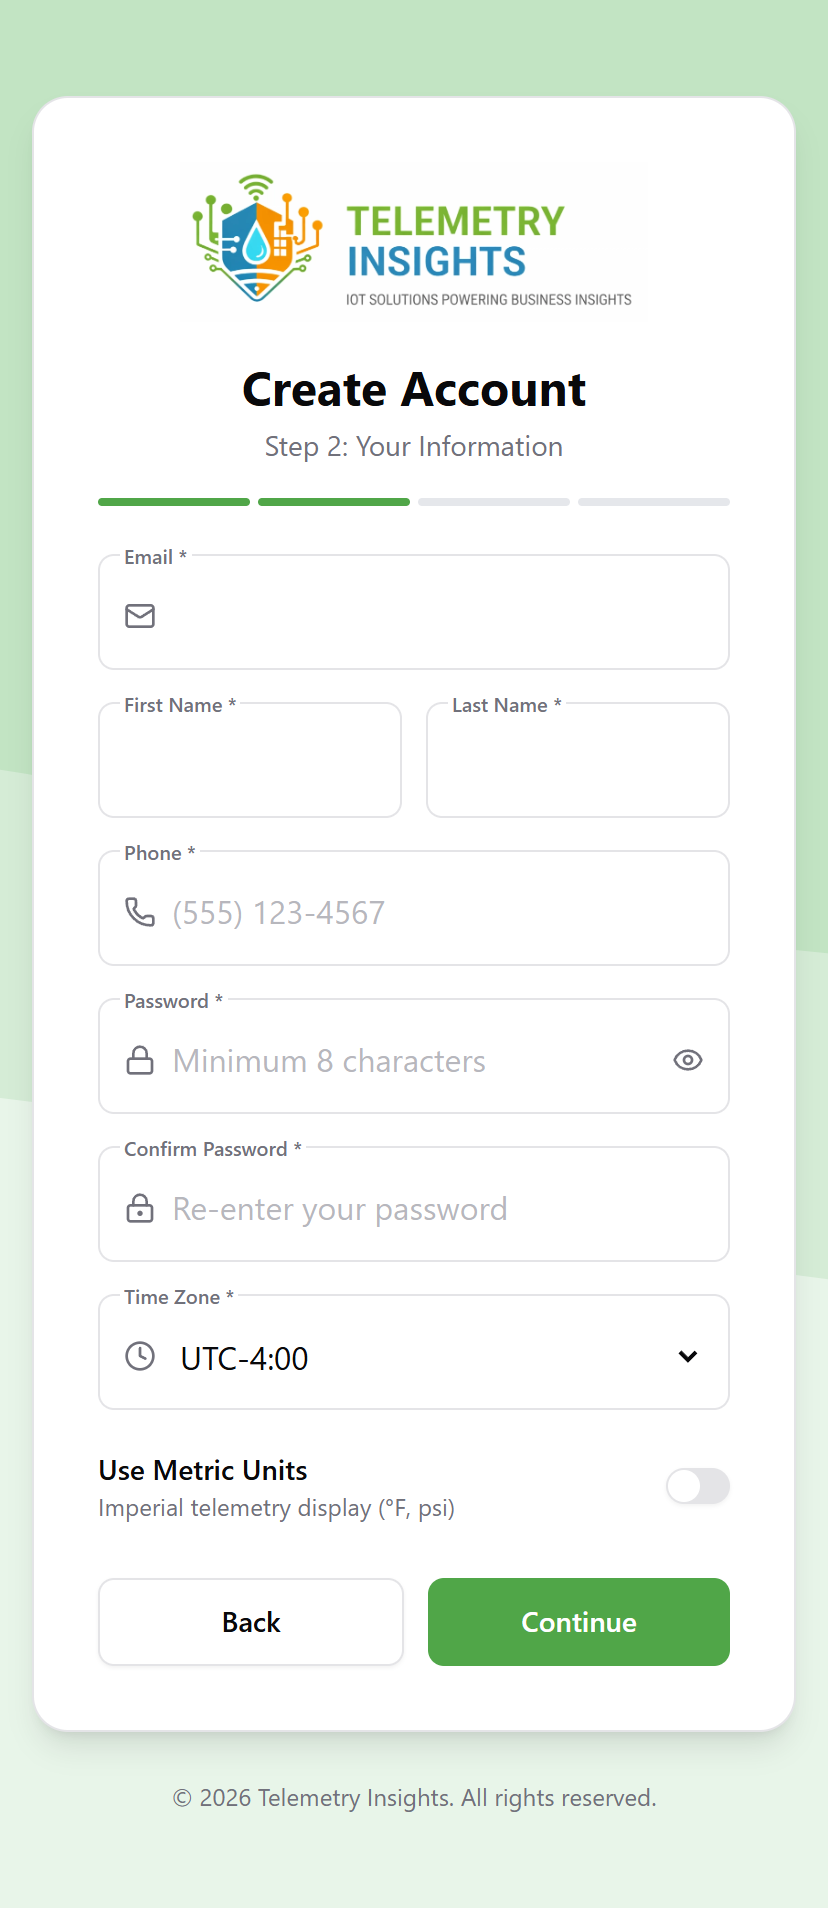
Wizard Step 2 - Your Info

Wizard Step 2, Your Info
View full size
Wizard Step 2, Your Info
FieldRequiredNotes
EmailYesPre-filled and locked if signing in with Google, Amazon, or Microsoft
First NameYesPre-filled if signing in with Google, Amazon, or Microsoft
Last NameYesPre-filled if signing in with Google, Amazon, or Microsoft
PhoneYes
PasswordYesMinimum 8 characters, not required if signing in with Google, Amazon, or Microsoft
Confirm PasswordYesMust match
Time ZoneYesAuto-detected
Metric UnitsNoDefaults to imperial (°F / psi). Toggle on for metric (°C / kPa).

Tap Continue.

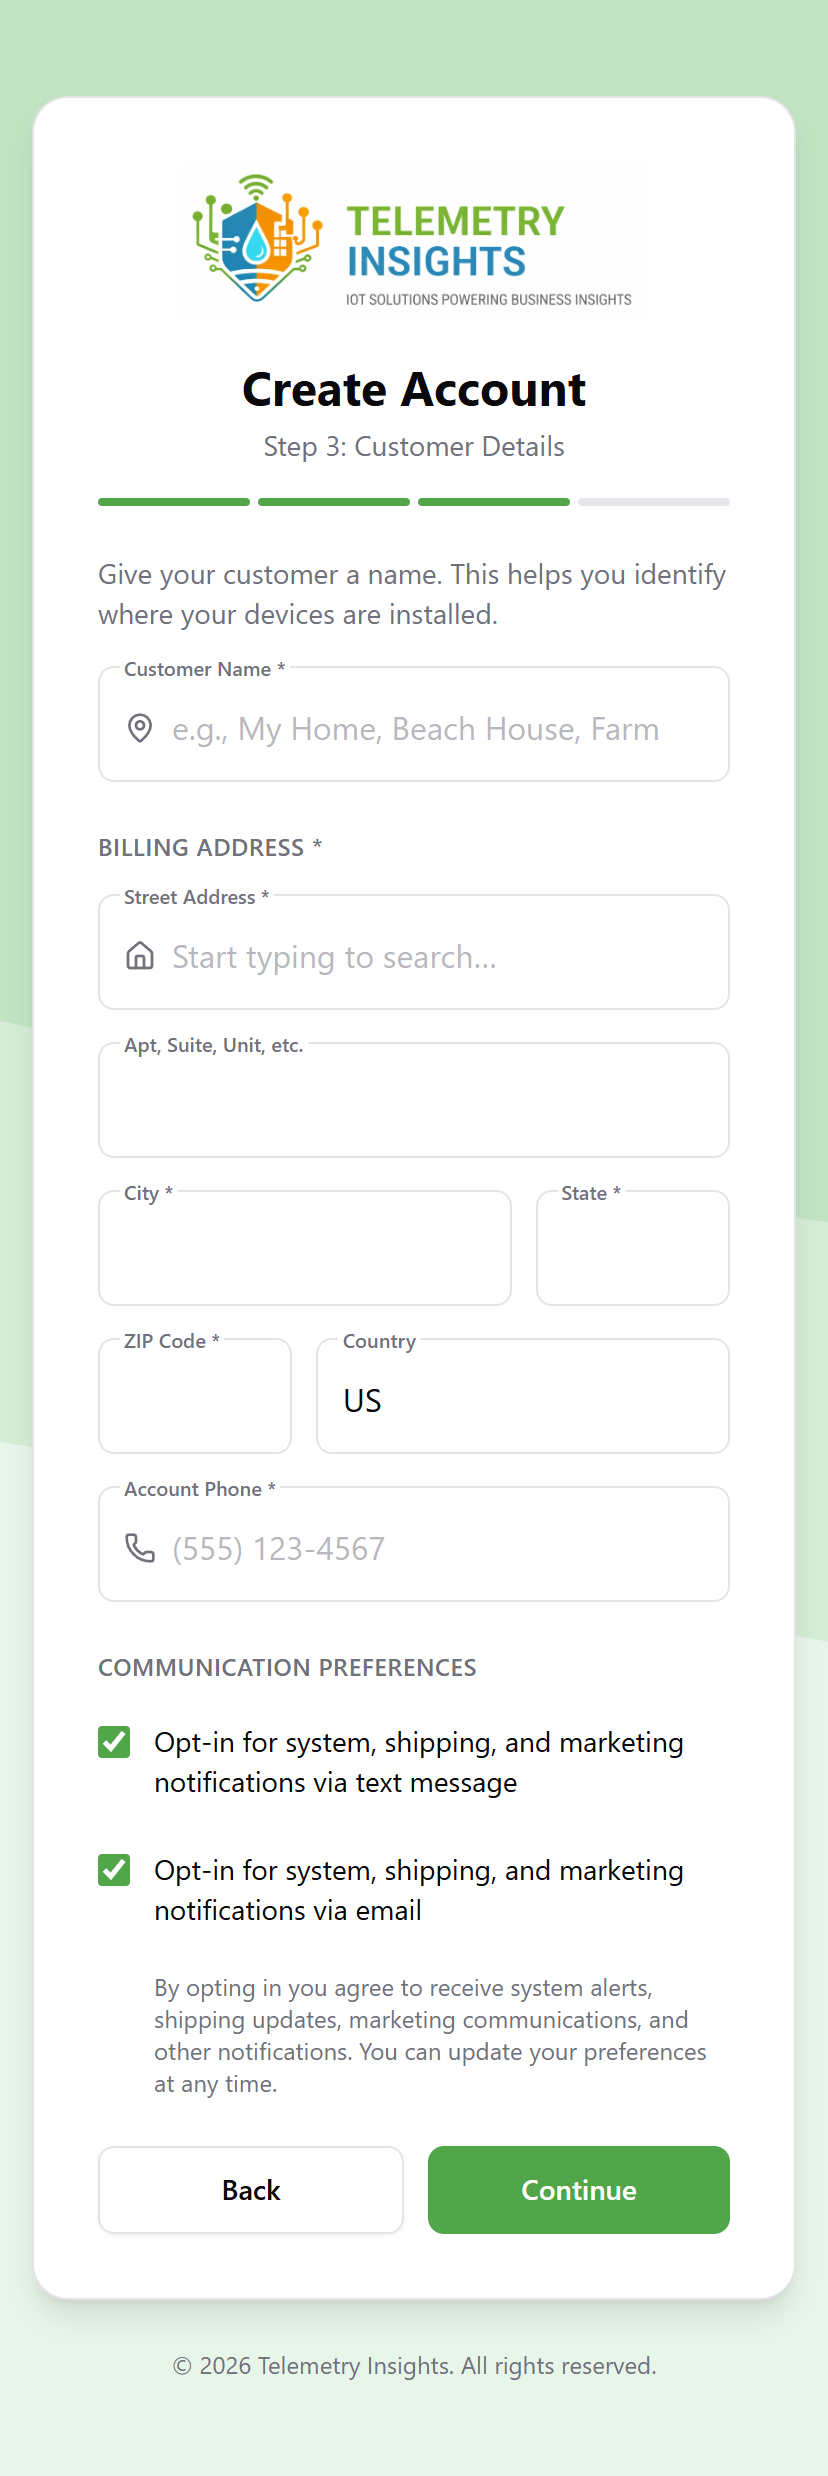
Wizard Step 3 - Your Account Info

Wizard Step 3, Your Account Info
View full size
Wizard Step 3, Your Account Info
FieldRequiredNotes
Customer NameYesYour account or business name, e.g. "Smith Residence", "Acme Farms"
AddressYesBilling and contact address, supports autocomplete
PhoneYes
Text notificationsNoOn by default
Email notificationsNoOn by default

Tap Continue.

About Locations: You only need one account, even across multiple properties or areas. After your account is set up, add named locations (e.g. "Front Yard", "Zone A, East Field") from Customer → Locations in the app. To assign a device to a location, go to Customer → Devices, tap the device card to expand it, and select the location from the Location dropdown.

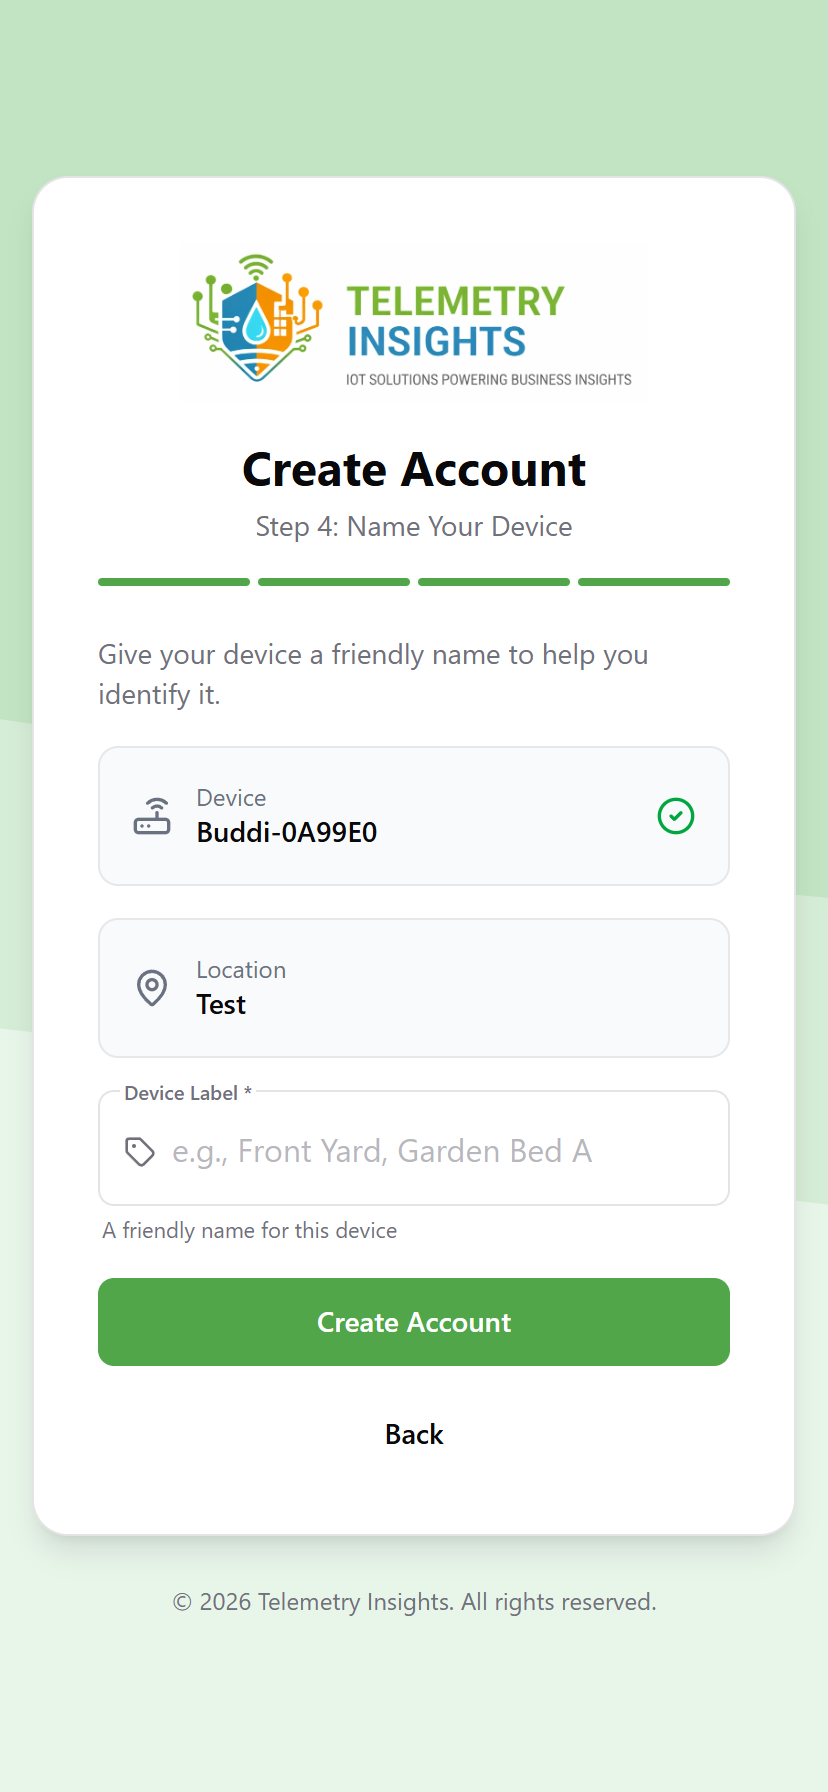
Wizard Step 4 - Label Your Device

Wizard Step 4, Label Your Device
View full size
Wizard Step 4, Label Your Device

Enter a Label for the device you just verified, a short, descriptive name that identifies where it is physically installed, such as "Front Yard", "Main Valve", or "Garden Bed A".

ℹ️ Labels are not checked for duplicates. The app will accept the same label on multiple devices. Use unique labels so you can immediately identify which device triggered an alert and know exactly where to go if a physical inspection is needed.

Tap Create Account.

After the Wizard - Sign In

You'll see a confirmation screen. Tap Go to Login and sign in with your email and password, or tap the Google, Amazon, or Microsoft button if your email is with one of those providers.

App sign-in screen
View full size
App sign-in screen

Activate a Subscription

After signing in, whether through checkout or the wizard, your device will appear in the app. You'll see a No Subscription status on any device that isn't yet on an active plan. Device data, alerts, and configuration are not accessible until a plan is active.

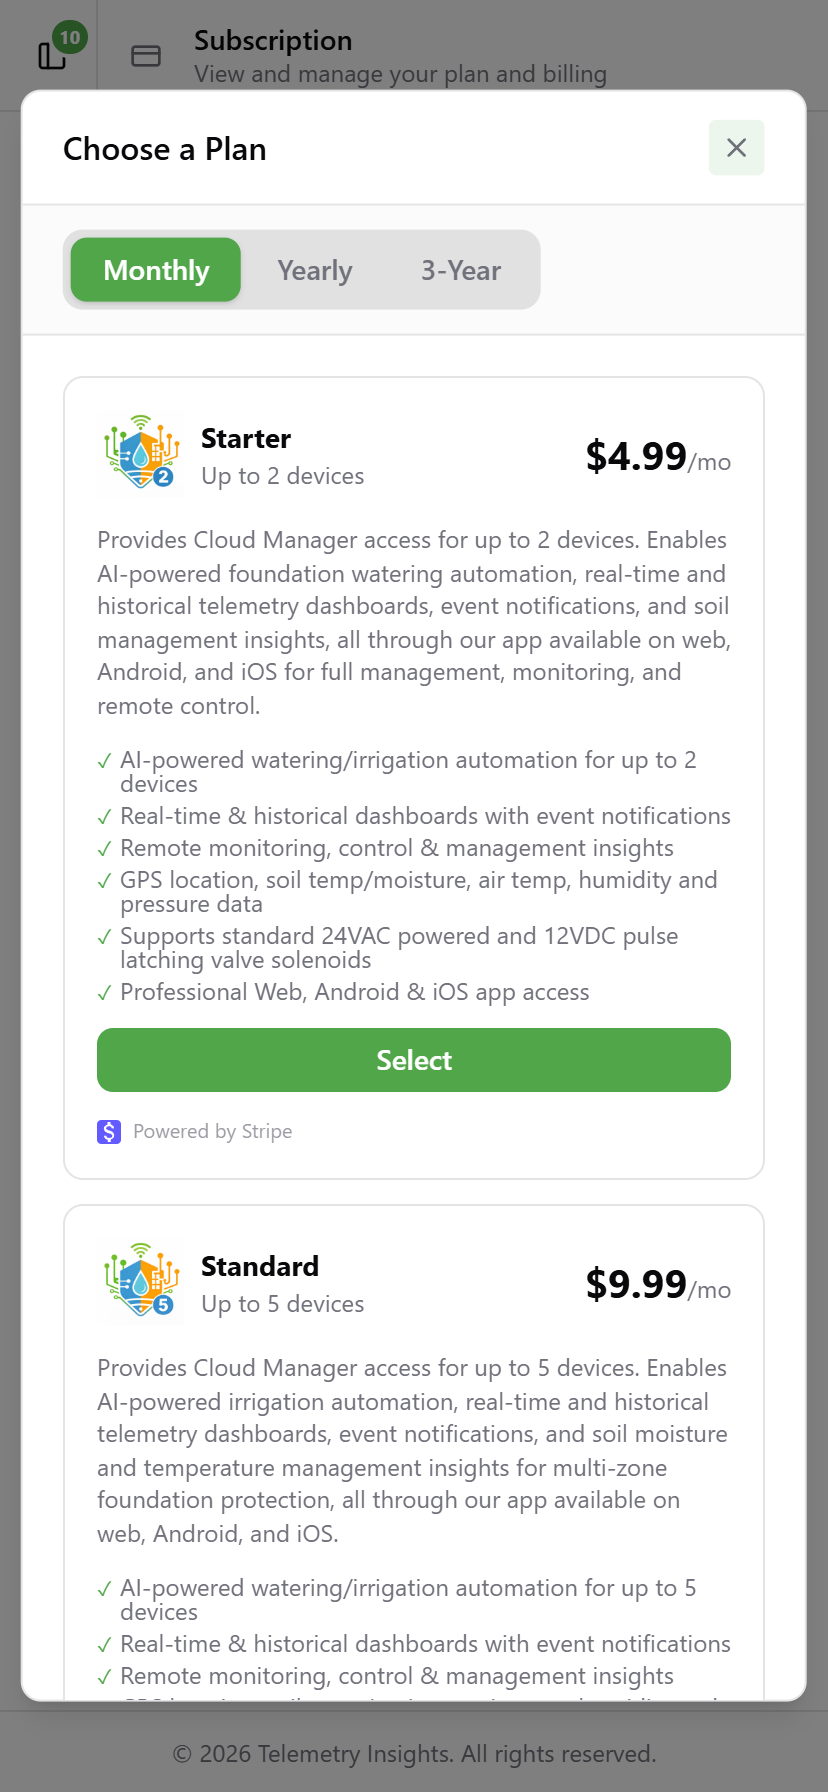
  1. Go to Subscription in the app menu.

  2. Tap Choose a Plan and select monthly, yearly, or 3-year billing.

    Choose a Plan
    View full size
    Choose a Plan
  3. Complete checkout, billing address and payment.

  4. Once confirmed, enable your device from the devices section.

Your device is now active and monitoring.


Need Help?

Creating Your Account | Telemetry Insights